
Success with Cap Embroidery – Big Markets, High Profits
Embroidered caps are in greater demand than ever – from urban streetwear and branded merchandise to premium corporate apparel. One standout trend is 3D puff embroidery, giving logos and designs a striking, dimensional look up to 8 mm thick. Whether you're crafting custom snapbacks, trucker hats, or classic baseball caps – embroidered headwear is a booming, high-profit market.
Pro Tips for 3D Puff Embroidery – How to Nail It!
To achieve clean, professional 3D puff embroidery on caps, the right punching technique is essential. Follow these expert settings:
1. Turn off stitch shortening
Ensure the foam is fully covered, especially around corners. Stitch shortening normally happens inside corners, to not fully perforate the material. In case of 3D foam embroidery, you need all stitches outside, nothing should be shortened. Make sure you find this parameter in your object settings..
2. Use high stitch density
A tighter stitch pattern cleanly perforates the foam and creates crisp, defined edges. A standard embroidery density is around 4, whereas for 3D embroidery you tend to go down to around 2, depending on your thread.
3. Fully close satin stitch end caps
Make sure edges and end-caps are completely stitched through, so excess foam can be removed easily. An additional Satin stitch can be helpful!
4. Secure the foam with a run stitch
Prevent slipping during embroidery by fixing the foam in place with a run stitch before the satin stitch.
5. Use proper entry/exit stitches
Apply the correct stitch types to maintain a clean, professional appearance throughout.
No digitizing software yet? BasePac Premium is the perfect product for you - take full control and use BasePac’s advanced tools to deliver flawless embroidery.
Product number 2: Z-009-5229

Easy Cap Hooping Tips – Embroidery Starts Here!
Proper hooping is crucial for precision embroidery on caps. These tips help you master the setup:
1. What clamping pressure is needed?
No more damage from overtightened frames! Our spring-loaded cap frame adjusts automatically – perfect for beginners and faster workflows.
2. Backing keeps slipping?
Secure it with double-sided tape for stability during stitching.
3. Design misaligned with the center seam?
Use the red mark on the cap guide. Place your design just slightly left of it for a perfectly centered final look.
🏁 Use ergonomic, freestanding hooping stations to prevent strain and improve accuracy. Discover our range in the shop!
Product number 2: Z-002-6875

Product number 2: Z-008-6019

3D Puff Embroidery Tips – You Can Do It Too!
Want to create eye-catching 3D embroidery effects? Here’s how:
1. Reduce speed if necessary
Slower stitching helps manage thick foam and avoid errors.
2. Use a needle with a shorter shaft
This allows the thread to move freely and prevents thread breakage when piercing dense foam.
3. Choose the right foam
The firmer the foam, the better the result. Match foam color to thread to hide any exposed areas.
Check out the foam we offer and get perfect results!
4. Get the thread tension right
Aim for ⅓ bobbin thread, ⅔ top thread visible on the reverse side for perfect tension.
Tip: Use our digital tension gauge and keep your thread tension consistent!
5. Puffy Pen
Extra Tip: Is there still some foam sticking out after the embroidery process? Conceal any remaining bits between the dense satin stitches during the finishing process using our 3D Puffy Pen. A hot air blower can also help smooth out the edges even more.
💡 Practice makes perfect – take time to fine-tune your technique and embrace the creative journey!
Product number 2: Z-009-3988

Product number 2: O-000-0483

Product number 2: Z-008-6475

Product number 2: Z-008-2182

3 Essential Accessories for Perfect Cap Embroidery
Boost your embroidery production with ZSK’s professional-grade tools, engineered for performance and ergonomic efficiency:
1. ZSK Premium Cap Drive
Maximum precision for detailed cap embroidery. This nearly vibration-free system delivers flawless stitching – ideal for logos and complex designs.
For ZSK SPRINT, SPRINT 8, and RACER machines. Upgrade kits available for older models
2. 360 Premium Cap Frame
Fast and accurate hooping with consistent results. Built-in visor stabilizer and improved tension holder minimize distortion for high-quality embroidery on any cap.
3. Cap Hooping Station
Create a health-friendly and efficient workspace. Ergonomic design ensures consistent hooping without strain.
Product number 2: Z-009-6126-M

Product number 2: Z-009-7476

Product number 2: Z-008-6019
The Perfect Machines for Cap Embroidery
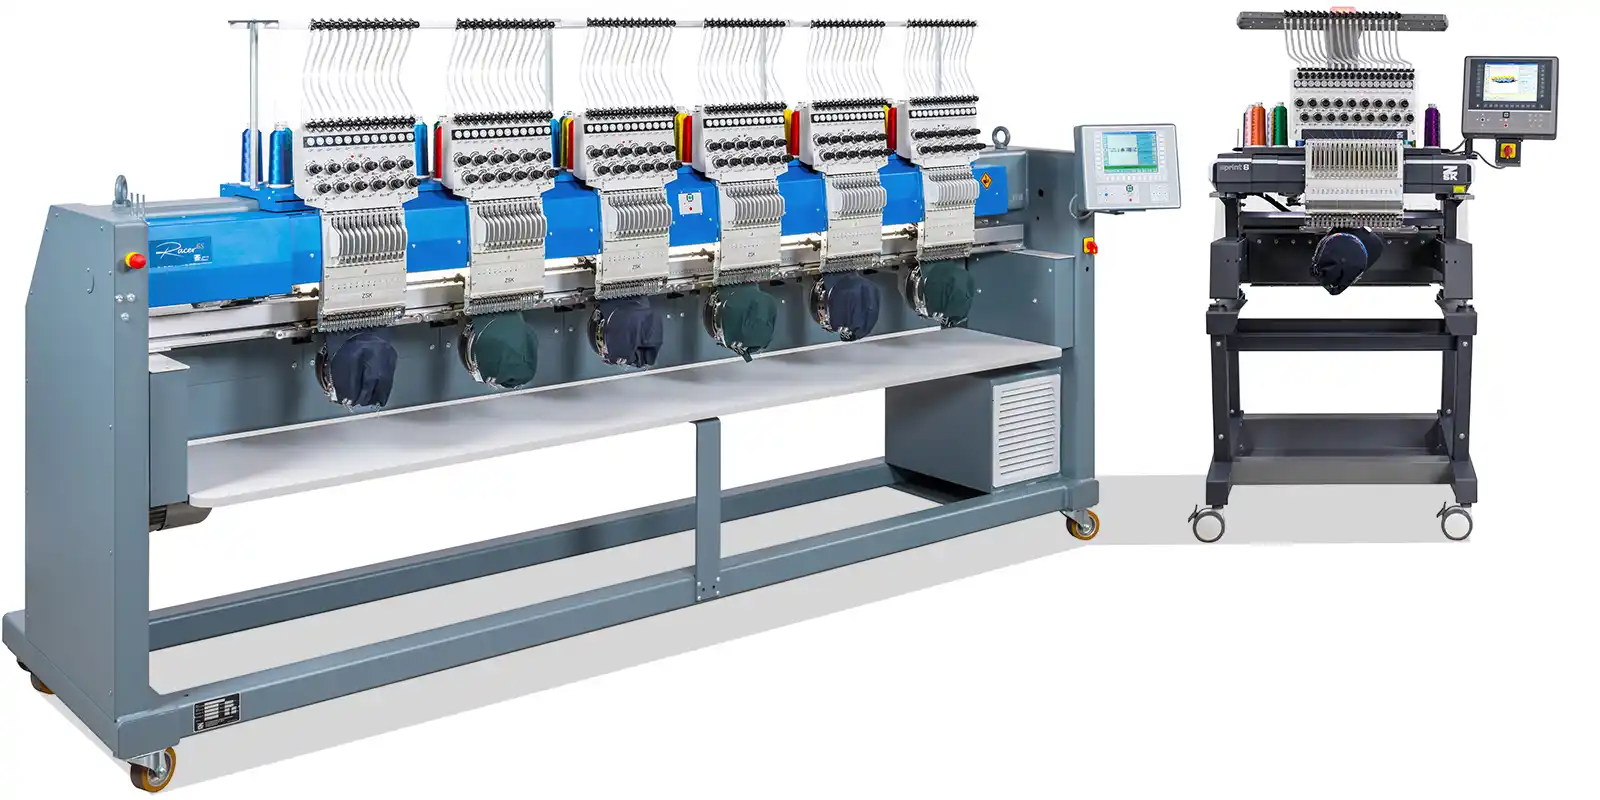
ZSK offers a versatile selection of embroidery machines tailored to your specific production needs:
• SPRINT Series:
The ideal single-head machine for maximum flexibility. Perfect for individual orders, prototypes, and companies with diverse designs.
> more info
• RACER Series:
Available with 1 to 12 embroidery heads, the RACER Series is ideal for serial production and ensures high speed and efficiency while maintaining consistently high quality.
> more info
18 vs. 12 Needles
Stay flexible and set up dedicated needles for your 3D Puffy projects! The rule here is: the more needles you have, the less setup time you need to plan for! Whether you're offering customized products or looking to scale up your production – ZSK machines deliver outstanding embroidery quality that meets your requirements.
Choose ZSK embroidery machines for unparalleled reliability, state-of-the-art technology, and long-lasting quality. Renowned worldwide for precision and performance, our machines are the ideal choice for industrial embroidery applications.